Buyer Admin documentation
Free Format Module
Contract Module
Buyer Admin: Introduction to the Contract Module
Buyer Admin: How do I create a local contract?
Buyer Admin: How do I approve a Framework?
Buyer Admin: How do I manage data within a live local contract?
Buyer Admin: How do I approve or reject Local Contracts?
Buyer Admin: How do I bulk upload local contracts to the Contract Module?
Buyer Admin: Contract Spend Analysis
Bring your own BI (BYOBI)
The Purchasing Homepage and Administration Interface
Buyer Admin: How can I customise the Homepage for my organisation?
Buyer Admin: How do I create a Marketplace News article?
Buyer Admin: Introduction to the Administration interface
Workflow Editor
End User Management
Buyer Admin: Insights - How do I give access to users?
Buyer Admin - How do I deactivate a user's account?
Buyer Admin: How do I re-activate a user?
Buyer Admin - Can I update a user's name if their name changes?
Buyer Admin - How do I create new end user accounts (basket punchout)?
Sustainability (ESG) Module
Buyer Admin: An introduction to Sustainability Data on Purchasing
Buyer Admin: Sustainability - Reporting on the ESG Insights Dashboard
Buyer Admin: How do I map sustainability attributes (supplier and global)?
Buyer Admin: How do I create my own organisation specific sustainability attributes for suppliers?
Buyer Admin: How do I approve a supplier level Global Sustainability Attribute?
Supplier Catalogue Management
Buyer Admin: Price Approval - How do I approve or reject a price file?
Buyer Admin: The Supplier Onboarding Module (SIM) overview
Buyer Admin: How do I connect with a supplier on my Purchasing marketplace?
Buyer Admin: How do I bulk invite suppliers to my Purchasing marketplace?
Buyer Admin: How do I make a hidden catalogue visible again?
Buyer Admin: How do I hide an entire supplier's catalogue?
Buyer Admin: How do I export a supplier catalogue?
Buyer Admin: How do I mark an entire supplier catalogue as 'Preferred'?
Buyer Admin - How can I change an item's visibility or status?
Buyer Admin: How do I enable/disable a marketplace supplier in Free Format?
Supplier documentation
Managing catalogue data on the Supplier Portal
Supplier: How do I complete the OneAdvanced data templates?
Supplier: How do I upload my products?
Supplier: How do I add delivery charges to my catalogue?
UNSPSC Version Update Guide
Supplier: How do I hide a product from a buyer(s)?
Supplier: How do I amend catalogue pricing?
Supplier: How do I upload PDF documents to my products?
Supplier: How do I maintain leading zeros on a .csv download?
Supplier: How do I create new products individually?
Supplier: How do I export my catalogue?
Supplier: eClass codes
Supplier: How do I approve a price file?
Supplier: Catalogue Management tab - What does each file status mean?
Supplier: How do I upload images to my catalogue?
Supplier: How do I provide catalogue pricing?
Supplier: How do I delete products from my catalogue?
Supplier: Catalogue Management tab: How do I use the filtering options
Supplier: How do I edit my product data?
Supplier: Why has my price file failed?
Supplier: How do I amend a catalogue number?
Trader suppliers
Search and product visibility
Supplier: How do my products appear on Purchasing?
Supplier: The Purchasing Search: An overview for suppliers
Supplier: How do I find out if a product is currently visible to my buyers?
Contract Module
Supplier: Introduction to the Contract Module
Supplier: How do I update an active contract?
Supplier: Contract spend analysis
Supplier: How do I export contract data from the Contract Module?
Supplier: How do I activate a framework contract?
Supplier: How do I set up a local contract?
Sustainability Module
Supplier: An introduction to managing sustainability data
Supplier: How do I tag my products with sustainability attributes (Global and Supplier)?
Supplier: How do I tag my organisation against a global sustainability attribute?
Supplier: How do I create and manage supplier sustainability attributes?
Supplier: How can I see which of my products have sustainability attributes already assigned?
Supplier: How do I remove a sustainability attribute from my data?
Supplier: Sustainability - Reporting on the ESG Insights Dashboard
eQuotes
Insights reporting
Supplier Insights: Categorisation (UNSPSC) Dashboard
Supplier: How can I view Insights reports?
Supplier Insights: On and Off Catalogue Orders
Orders and Invoices
Supplier: Purchase Orders
Supplier: How do I resend a rejected e-invoice?
Supplier: PO flip invoicing and Credit Notes
Supplier: How can I review any invoice rejections?
Updating my profile
Buyer End User documentation
Buyer User Guide: How do I use the eQuotes module?
Buyer User Guide: How do I configure my Homepage?
Buyer User Guide: End User (eReqs and basket workflow users only): Multi Factor Authentication for logins
Buyer User Guide: How do I 'favourite' a product?
Buyer User Guide: How do I search for sustainable products?
Buyer User Guide: How do I create and use Saved Baskets?
Buyer User Guide: How do I download a PDF copy of my Purchase Order?
Buyer User Guide: The Purchasing Homepage
Buyer User Guide: How do I raise a free text order?
Supported Frameworks
Buyer Insights: On and Off Catalogue Orders
Buyer User Guide: Searching on the Purchasing marketplace
Buyer User Guide: How do I customise Insights on the homepage?
Release Notes & Product Roadmap
Release Notes
2026
2026-07-09 Release Notes
2026-06-25 Release Notes
2026-03-19 Release Notes
2026-03-10 Release Notes
Q1 & Q2- Product Roadmap Update
2026-01-22 Release Notes
2026-01-08 Release Notes
2025
2025-12-11 Release Notes
2025-11-13 Release Notes
2025-10-16 Release Notes
2025-08-21 Release Note
2025-07-24 Release Notes
2025-07-10 Release Notes
2025-06-26 Release Notes
2025-05-30 Release Notes
2025-05-01 Release Notes
2025-04-04 Release Notes
2025-03-20 Release Notes
2025-03-06 Release Notes
2025-02-20 Release Notes
2024
2024-10-31 Release Notes
2024-10-17 Release Notes
2024-10-03 Release Notes
2024-09-05 Release Notes
2024-07-18 Release Notes
2024-06-20 Release Notes
2024-06-06 Release Notes
2024-05-23 Release Notes
2024-05-09 Release Notes
2024-04-18 Release Notes
2024-02-22 Release Notes
2024-01-18 Release Notes
2023
2023-12-11 Release Notes
2023-11-23 Release Notes
2023-11-09 Release Notes
2023-10-26 Release Notes
2023-10-12 Release Notes
2023-09-28 Release Notes
2023-08-30 Release Notes
2023-08-17 Release Notes
2023-08-03 Release Notes
2023-07-06 Release Notes
2023-06-22 Release Notes
2023-06-07 Release Notes
2023-05-24 Release Notes
2023-05-11 Release Notes
2023-04-27 Release Notes
2023-04-13 Release Notes
2023-03-30 Release Notes
2023-03-16 Release Notes
2023-03-02 Release Notes
2023-02-16 Release Notes
2023-02-02 Release Notes
2023-01-19 Release Notes
2022
2022-12-08 Release Notes
2022-10-13 Release Notes
2022-08-18 Release Notes
2022-08-04 Release Notes
2022-07-07 Release Notes
2022-06-23 Release Notes
2022-06-09 Release Notes
2022-05-26 Release Notes
2022-04-28 Release Notes
2022-03-03 Release Notes
2022-02-17 Release Notes
2022-01-13 Release Notes
2021
2021-11-25 Release Notes
2021-10-14 Release Notes
2021-09-30 Release Notes
2021-09-14 Release Notes
2021-09-11 Release Notes
2021-09-02 Release Notes
2021-08-19 Release Notes
2021-08-05 Release Notes
2021-07-22 Release Notes
2021-07-08 Release Notes
2021-06-24 Release Notes
2021-06-17 Release Notes
2021-05-27 Release Notes
2021-04-08 Release Notes Amendments Service
2021-03-04 Release Notes
2021-02-04 Release Notes
2021-01-21 Release Notes
2020-12-17 Release Notes
Product Roadmap
Marketplace (Purchasing) Video Content
Video - Purchasing Overview Project v1
Video - Saved Baskets and Favourites
Video - eOligo Module
Video - eServices Module
Video - Managing Internal Catalogues
Video - eQuotes
Video - Free Format
Video - eCatalogue Overview
Video - Supplier Insights
Video - Basket Workflow
Video - eFinancials Integration.mp4
Video - Punchouts
Video - Contract Management
Video - PO Flip eInvoicing
Video - Price Approval
Video - eRequisitions
Video - Sustainability Module - Buyers and Suppliers
Video - Buyer Insights
Logging into the Purchasing Marketplace
Buyer Admin: Accessing locked admin log-ins (including forgotten password)
Supplier: Multi Factor Authentication when logging in
Supplier: How do I request a new supplier portal login to be created?
Buyer Admin - How do I access my admin account?
Setting up MFA in Google Chrome Extension
Supplier: How do I reset my Purchasing account password?
Buyer Admin: Multi Factor Authentication for logins
Inactive User Account - How can I reactivate my marketplace login?
Setting up MFA in Microsoft Authenticator and Removing an Existing QR code
MFA Browser Extensions
- All Categories
- Logging into the Purchasing Marketplace
- Setting up MFA in Google Chrome Extension
Setting up MFA in Google Chrome Extension

The Chrome Extension provides an additional layer of security by enabling multi-factor authentication (MFA) for your online accounts.
How to Set Up Microsoft Authenticator Chrome Extension
- Install the Extension
Open Chrome Web Store:
- Visit the Chrome Web Store.
- Search for Microsoft Authenticator:
- In the search bar, type "Authenticator" and hit enter.
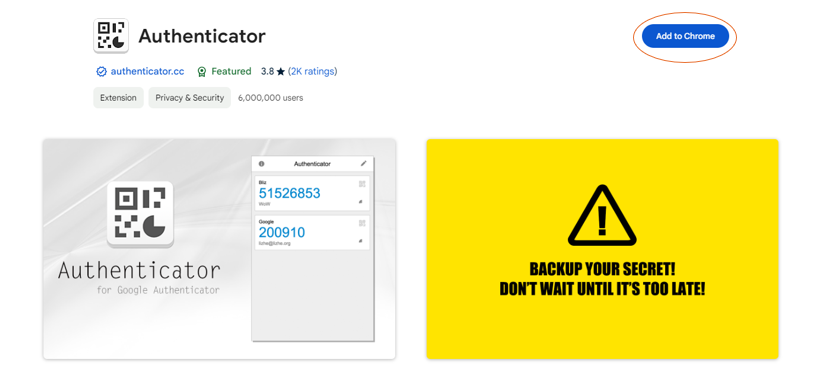
- Add to Chrome:
- Click on the Authenticator extension from the search results.
- Click the "Add to Chrome" button.
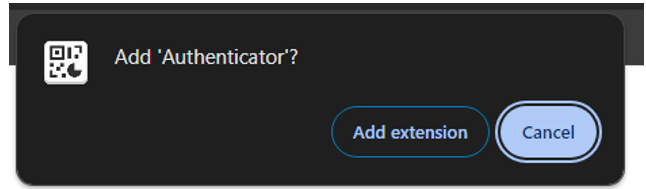
Confirm by clicking "Add extension" in the pop-up window.
How to Set Up Chrome Authenticator?
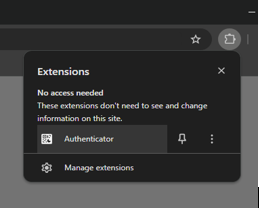
- Open the Extension
- After installation, click the puzzle piece icon (Extensions) in the Chrome toolbar and select the Authenticator extension.
- Add Accounts
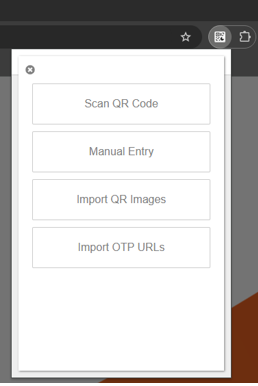
- To add an account, click on the extension icon.

- Choose the authenticator application to add a new account.
- Scan a QR code from the service you want to secure or enter a setup key manually.
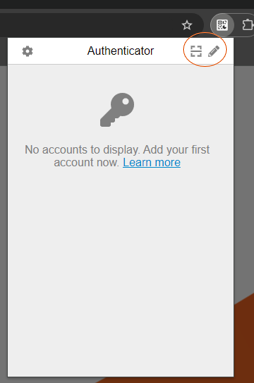
- Click on the scan icon or a pen icon to manually add setup key.
- Choose the scan QR option to setup.
- Generate and Use Codes
- Once your accounts are set up, the extension will display TOTP codes.
- Use these codes during the login process when prompted by your online accounts.
Below is the sample screenshot of what the code looks like.
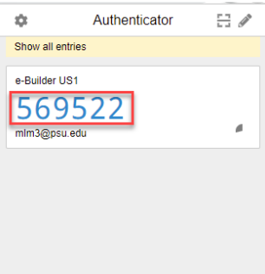
- Now the authenticator should indicate the code required for the OneAdvanced Purchasing.
- This will need to be entered into the Verification code box on your login page.